Skip to content

The roof is a crucial element of any shed, protecting its contents from the elements and completing its overall structure.
Building a shed roof yourself can offer cost savings and a sense of accomplishment. However, it’s important to remember that construction involves safety precautions and technical know-how. This guide will walk you through the process of building a shed roof, step-by-step, so you can approach the project with confidence.
Shed Roof Design
Though shed roofs are fairly straightforward, you will still need the right materials and tools.
Materials
- Lumber: Rafters, ridge beam, top plates, fascia boards, soffit boards, blocking
- Plywood or OSB boards for roof sheathing
- Roofing material (e.g., asphalt shingles, metal sheets, rubber membrane)
- Roofing nails, staples, or screws (depending on chosen material)
- Flashing material (e.g., tar paper, self-adhesive flashing)
- Ridge cap (optional)
- Safety gear: goggles, gloves, hard hat
Tools
- Tape measure
- Level
- Circular saw
- Miter saw
- Hammer
- Drill
- Staple gun (optional)
- Roofing hammer (optional)
- Utility knife
- Safety glasses
- Work gloves
Architecture of a Shed Roof
The beauty of a shed roof lies in its simplicity and functionality. Here are the components:
- Rafters: Think of these as the backbone of your roof. They are the long, sturdy beams that run from the peak of the roof down to the walls of the shed, forming the slope.
- Ridge Beam: Serving as the pinnacle of the roof, this horizontal element supports the upper ends of the rafters, much like a warm smile that brings everyone together.
- Top Plates: These horizontal members provide a secure landing for the rafters and help tie the walls to the roof.
- Fascia Boards: Running along the edges of your roof, these boards act as the finishing touch, sort of like neatly tucking in the edges of a bed.
- Soffit Boards: Tucked underneath the overhang of the roof, soffits keep the underside of your roof looking nice and tidy, while also providing essential ventilation.
- Blocking: These are short pieces of lumber fitting between the rafters for extra support.
- Roof Sheathing: Sheets of plywood or OSB that cover the rafters.
- Roofing Material: Whether shingles, metal, or rubber membrane, this is the outermost layer of your roof that shields against the weather.
Remember, each part of your shed roof contributes to a stronger, more resilient whole, just as every person adds to the fabric of a welcoming, tight-knit community. With every nail hammered and every beam aligned, you’re not just constructing a roof – you’re crafting a haven.
Step-by-Step Directions to Build a Shed Roof
Follow these step-by-step directions to build a shed roof.
Step 1: Check Local Building Codes
Consult with your local municipality to ensure that your project meets local building codes and to obtain any necessary building permits.
Step 2: Plan the Roof
Planning is key to success in building your roof.
Determine the Slope
The slope is the amount of vertical rise for every 12 inches of horizontal run. To choose the right slope, consider your area’s weather patterns—steep pitches are fantastic for areas with heavy snowfall, while a gentler slope might be just the ticket for dryer spots.
- Flat – 1.00
Suitable for arid climates, easy to construct but requires regular maintenance to avoid water pooling. - Low – 1.03-1.15
Simple design, cost-effective for moderate climates; may demand more frequent inspection. - Medium – 1.15-1.30
Balances aesthetics with functionality, ideal for areas with moderate rainfall and snow. - Steep – 1.30-1.50
Excellent for heavy snowfall regions, ensures quick runoff and less weight on the structure.
The numbers are multipliers used to estimate the amount of roofing material needed for your shed. For instance, if the slope of your roof and your climate suggests a medium pitch and your shed has a 100 square-foot base, you would multiply 100 by 1.15 (for the low end of a medium pitch) to 1.30 (for the high end), giving you a range of 115 to 130 square feet of roofing material required. Always factor in a little extra for overlap and waste to ensure you’ve got everything covered.
Step 2: Calculate Material Needs

Now that you’ve got the size and slope pinned down, figure out exactly how much material you’ll need to complete your shed’s roof.
Lumber Calculations
To estimate the amount of lumber required, start by determining the number of rafters. You’ll need a rafter for each end, plus more spaced 16 to 24 inches apart in between. The total length of your rafters equals the run of the roof plus the overhang. To find the total linear feet of lumber, multiply the number of rafters by their length.
Plywood or OSB Sheathing
Measure the length and width of the roof to calculate the surface area. Divide this number by 32 square feet (the area of a standard 4×8 sheet) to get the total number of sheets needed. It’s always wise to add about 10% for waste and cutting.
Shingles or Roofing Material
Roofing materials are typically sold by the square—one square covers 100 square feet. So, take the roof area you calculated earlier and divide by 100 to get the number of squares needed. Add 10-15% for waste, especially with shingles, since you’ll need to cut some to fit angles and edges.
Remember, this planning step is about inclusion and making sure no nail is left unbought and no board uncounted. Be liberal with your estimates, as it’s better to have a bit extra than to find yourself short mid-project.
Step 3: Build the Rafters
- Measure and cut – Determine the rafter length based on your chosen roof pitch and shed dimensions. Use a rafter calculator or consult building codes for guidance. Cut the lumber according to your measurements, making sure to account for overhangs.
- Mark and cut birdsmouth joints: These notches at the top of the rafter will fit onto the ridge beam. Mark the joint location using a square and cut carefully with a saw.
- Assemble the rafters: Lay out the rafters spaced evenly across the top plates. Secure them using nails, screws, or metal connectors, ensuring proper alignment.
Step 4: Installing the Ridge Beam and Top Plates
- Attach the ridge beam: Connect the ridge beam to the top of the rafters using nails or screws. Double-check for levelness throughout.
- Install top plates: Attach the top plates along the top edges of the shed walls to create a secure frame for the roof. Ensure the top plates are level and aligned with the rafters.
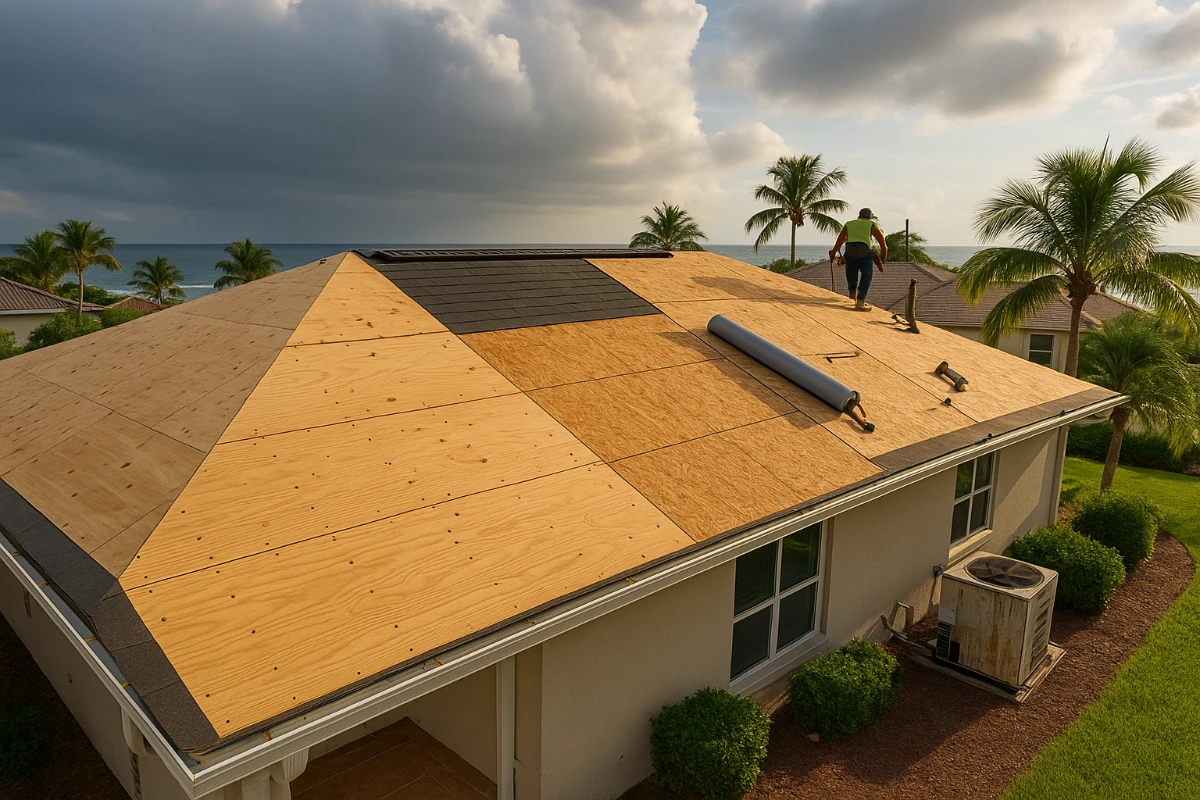
Step 5: Adding Roof Sheathing
- Cut plywood/OSB boards: Measure and cut the plywood/OSB boards to fit between the rafters, leaving a slight overhang at the edges.
- Attach the sheathing: Secure the sheathing boards to the rafters using nails or staples. Overlap the edges slightly and stagger the joints for added strength.
- Install drip edge: Attach a drip edge along the overhang to prevent water from dripping down the walls.
Step 6: Installing Flashing and Underlayment
- Apply flashing: Install flashing around roof penetrations like chimneys or vents to prevent water leaks. Use appropriate flashing material and follow the manufacturer’s instructions for installation.
- Add underlayment: Cover the entire roof sheathing with an underlayment material like tar paper or felt. This creates an extra layer of protection against water infiltration.
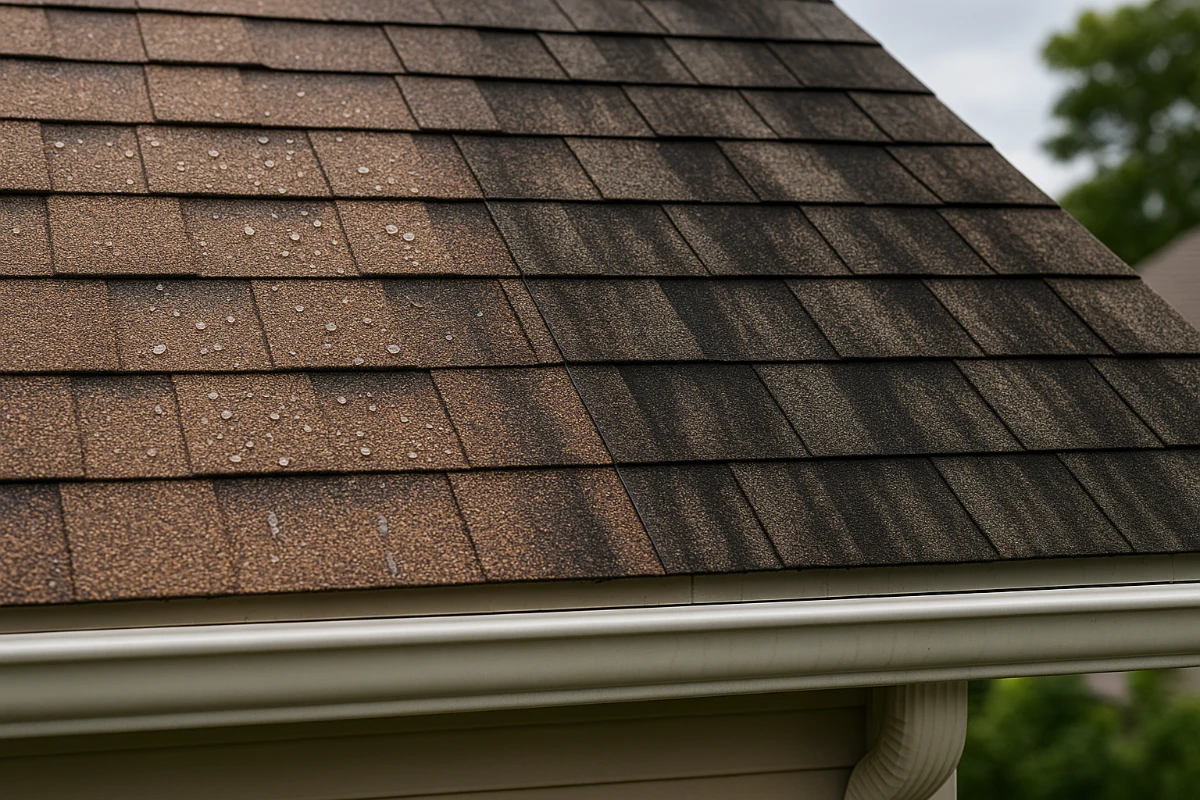
Step 7: Choosing and Installing Roofing Material
- Select your roofing material: Choose a material suitable for your climate and budget. Popular options include asphalt shingles, metal sheets, or rubber membranes.
- Follow installation instructions: Each roofing material has specific installation requirements. Carefully follow the manufacturer’s instructions to ensure proper waterproofing and longevity.
Step 8: Finishing Touches
- Install fascia and soffit boards: These boards cover the exposed rafter ends and the underside of the roof overhang, providing a finished look.
- Add a ridge cap (optional): This decorative piece covers the exposed ridge beam and adds a finishing touch to the roof.
- Clean up: Remove any debris and construction materials from the work area.
Safety Tips
Of course, safety is always paramount on any construction project:
- Always wear safety gear when working with tools and materials.
- Secure ladders properly and use fall protection equipment when working at heights.
- Be aware of weather conditions and avoid working in rain or strong winds.
- If unsure about any step, consult a professional for guidance.
Stronghold Roofing & Solar
When you need a roofing company in Lakeland, Sarasota, or southern Georgia, call the professional team at Stronghold Roofing. Whether it’s installing metal roofing on a shed or repairing damage to your home’s roof, our Lakeland roofers have the expertise to handle all your roofing service needs.
FAQs – Shed Roofs
Can I DIY a metal shed roof?
With the right tools and knowledge, a DIY enthusiast can install a metal shed roof. However, it’s important to follow proper safety precautions and consult building codes for guidance.
What materials are best for shed roofs?
Some popular materials for shed roofs include asphalt shingles, metal sheets, and rubber membranes. Consider your climate and budget when selecting the best material for your shed roof. Additionally, be sure to follow proper installation instructions for optimal waterproofing and longevity of your roof.
Can I buy pre-constructed shed roof framing?
You can purchase pre-constructed shed roof framing kits that include all the necessary materials and instructions for assembly. This can be a convenient option for those without much construction experience. However, it’s important to carefully follow the instructions and ensure proper installation to avoid any future issues with your shed roof.
How long does a shed roof last?
The lifespan of a shed roof will depend on the materials used and the climate it is exposed to. However, with proper maintenance and installation, most shed roofs can last anywhere from 20-50 years or more. Be sure to choose durable materials and regularly inspect your roof for any signs of damage or wear and tear.